How to Create a Digital Dream Board
February 19, 2021
Laura Rooker
Hey there!
Creating a digital dream board has been a concept I’ve been thinking about a lot lately! A company I used to work for was big on self-reflection and growth and always encouraged us to make our own dream boards. Years back I’d spend time cutting out photos and words that inspired me from magazines and would glue them to tagboard and hang them above my workspace at home! I’d find pictures of beaches, and runners, and words like “family” and “finances” and create a collage. It was a fun and effective activity because having your goals right in front of your face can really work wonders to your subconscious over time (especially if they’re specific and tailored to what you actually want). After moving to a new apartment, I lost track of those boards that inspired me on the daily and I’ve been thinking a lot about it lately as I reflect on my goals for the next several years.
I’ve been seeing people on Pinterest and Instagram creating digital dream boards and I thought I’d take a crack at it. I know there are apps you can download to create them, but I decided to make mine in my favorite design program:
Canva!!
I wanted to use Canva for two reasons:
-
It’s extremely user-friendly.
-
There are a million zillion images and elements you can easily click and crop to make the perfect collage!
Check out my post all about Canva here!
Before I explain exactly how I created my dream board, I wanted to talk a little bit about what it is. A dream board is….. anything you want it to be! This activity allows you to think of your goals and present them in as creative of a way as you’d like. Something I want to be sure to add is to make sure that the images and words you’re adding to your dream board are actually things you want to be apart of your life. Don’t add in a picture of a gigantic family just because that’s what your friends want. Don’t put pictures of stacks of cash if that’s not really what you’re about. Make sure it includes what you want and are passionate about.
Here’s the dream board I created this morning in Canva and uploaded to my cell phone to set as my background:
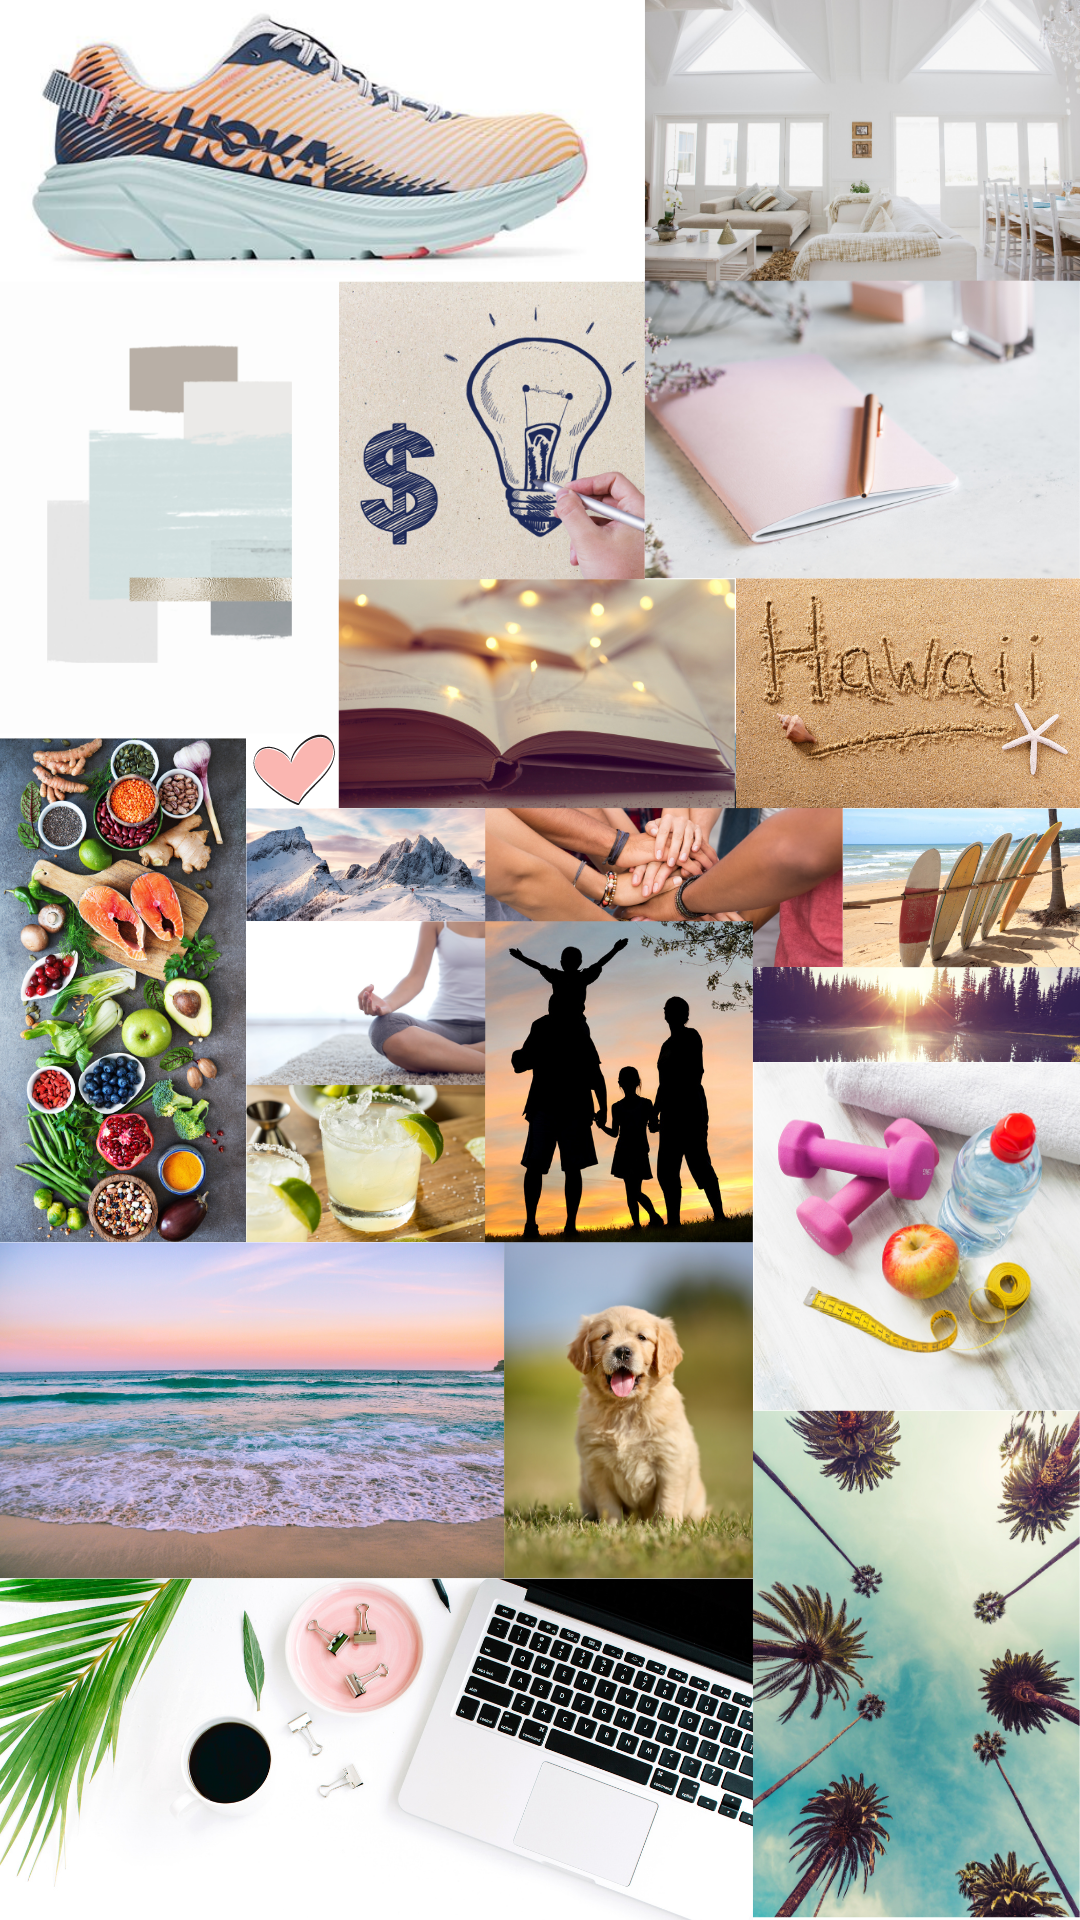
I’ve included things like a beach, a mountain range, and other places I want to regularly visit. I’ve included a laptop and one of my designs to remind me to always be creative. Health and fitness are also important to me as well as friends and family. Etc! As you can see, anything is fair game 🙂
Now that you’ve seen an example, let’s get you started!
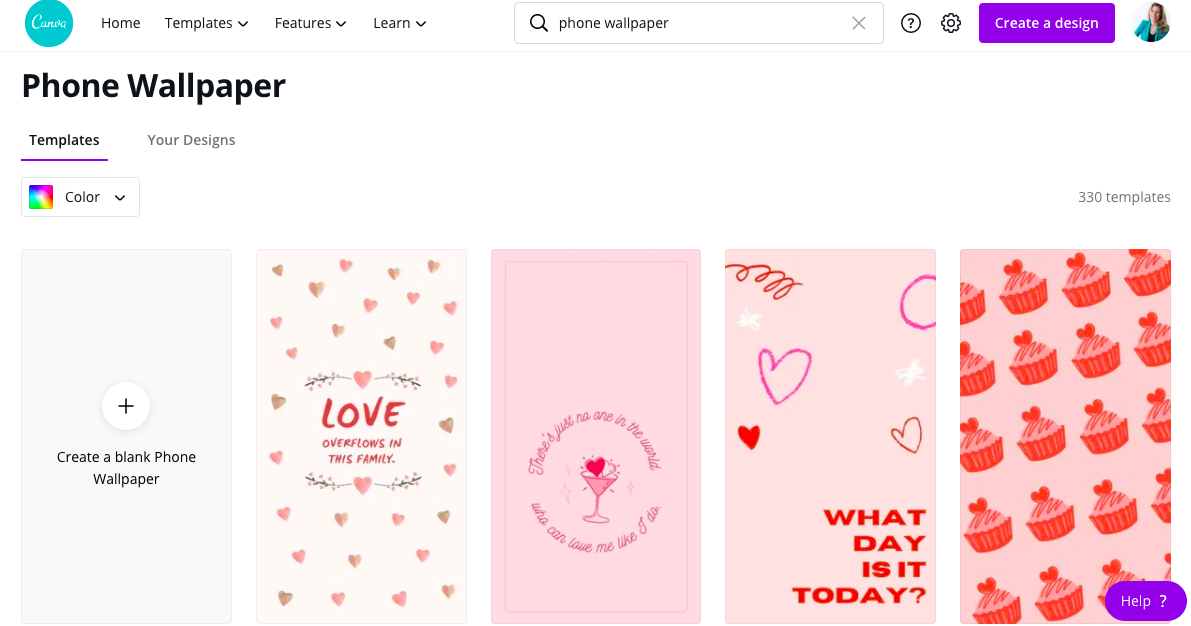
Step One: Go to Canva.com on a laptop / desktop
Once you’re there, you have the option to create any design you wish! I recommend typing “Phone Wallpaper” in the search bar at the top if you want to create an image to set as your phone background (that’s what I’ve done). If you want to make any other size though, you can! For this blog post, I’ll be using the phone example. Select the “create a blank” option to start your project from scratch as you see below. This will start your dream board as a 1080px by 1920px sized project; perfect for any phone background.
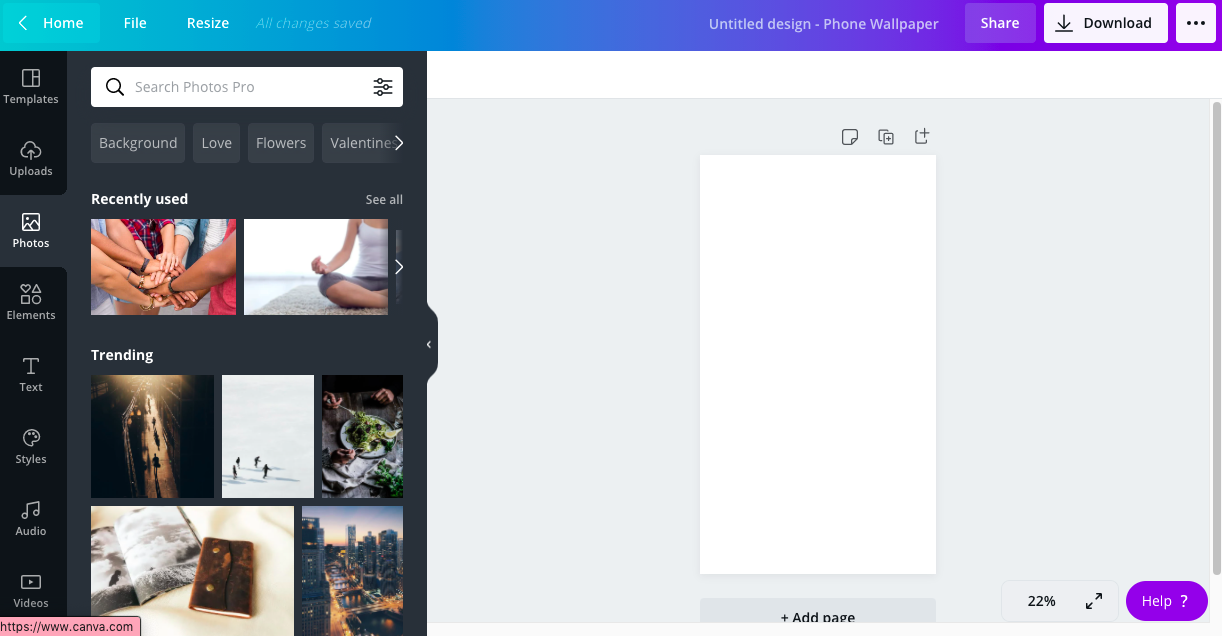
Step Two: Search for Images to Add
In this image you’ll see the workspace Canva has set up with your project’s dimensions. On the right side is the project space, and on the left is where you can search and discover images, texts and fonts, different elements, and more! Have fun with it, play around with the features. You can change the background color, you can upload your own photos from your computer, whatever you choose!
Step Three: Start Adding to Your Project!
This is the part where Canva’s user-friendliness really comes into play. All I did for my dream board was search in the “photos” section on the left hand side for things I’m passionate about and want to be apart of my life, and click and adjust the images in the project area. Here’s an example of that below! Adjusting, cropping, and moving the images around is super easy.

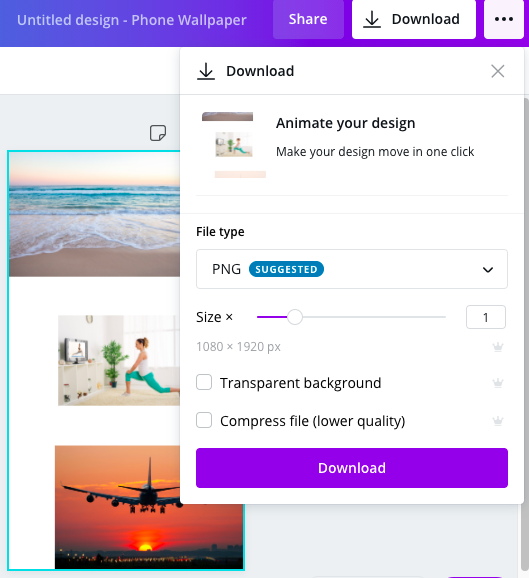
Last Step: Save Your Dream Board
When you’re totally finished with your project and are loving the inspiration you see, simply click download in the top right corner of the project area. You can select whichever file type you’d like. I downloaded mine as a PNG and then sent it to my phone through drop box to add as my phone background! As you can see below you can even animate your design into a fun video. Like I said, you’re free to make this project your own.